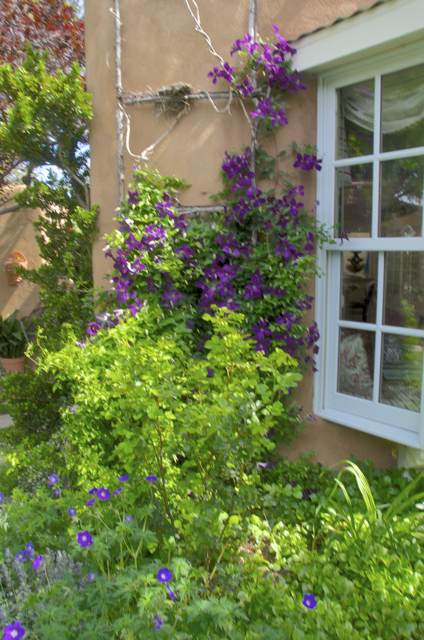
Clematis viticella ‘Jackmanii’ (Photo: Janice Tucker)
Clematis species and cultivars
Common names: Clematis, Traveller’s Joy, Virgin’s Bower, Old Man’s Beard, Leather Flower, Vase Vine
Plant Family: Ranunculus (Ranunculaceae)
By Janice Tucker
Special thanks to Rosemary Minard for providing sources and access to her beautiful garden. Also special thanks to Helen Woody for her proofreading skills.
When viewing a garden, our instincts are to look out and down. Vines add another dimension of beauty by compelling us to look up. While clematis can also be planted as a ground cover, they were born to climb. The plant is named for the ancient Greek word, clematis, which means, “climb”. A fully blooming clematis spilling over an outdoor wall, ascending a trellis or as a living canopy draping from an arbor is a gardener’s dream.
Clematis are believed to have originated in China. Over the last few centuries they have spread throughout other temperate climes of the northern hemisphere where temperatures normally stay above 0 degrees Fahrenheit (-20 C).
There are over 250 species, hybrids and cultivars of clematis with more
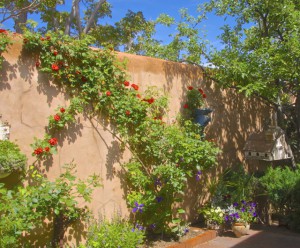
Clelmatis integrifolia ‘Durandii’ and Rosa ‘Blaze Improved’ (Photo Janice Tucker)
being introduced every year. Most are climbers but can be planted as a ground cover to create a stunning, spreading carpet of flowers. They are deciduous in cooler climates and considered an evergreen in warmer regions. The delicate, woody stems of new clematis become more substantial as they age. The leaves are opposite and compound with leafstalks that twist and twine around supporting structures and nearby plants. They are friendly climbers, content to share space with other plants without choking out their neighbors. A popular companion planting is to pair clematis to intertwine with a climbing rose.
The distinct personality of each clematis species manifests itself in the form of various shapes, compositions, colors and bi-colors. Clematis flowers can be single, double or multi-petaled. Some species may mess with your head a bit by producing a mix of these compositions on the same plant.
The 5 basic shapes of clematis are star, bell, double bell, tubular and lantern. However, most clematis will open into a flat, star-shaped flower. Color choices are plentiful that range from several shades of white, red to light pink, blue, dark purple, lavender and some bi-colors.
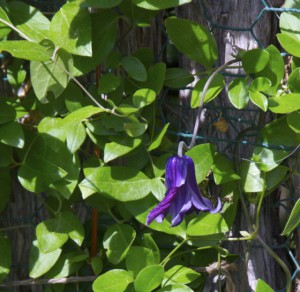
Clematis ‘Rooguchi’ Rosemary Minard Garden (Photo Janice Tucker)
Yellow is rare in the large-flowering varieties but there are several stunning yellows to be found in the small-flowering groups. As new cultivars are developed, there are bound to be more clematis colors to select in the future. (Source 1)
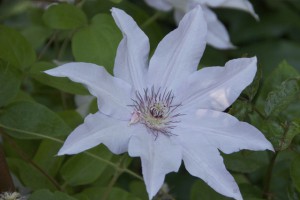
Whitish pink Clematis (Photo Janice Tucker)
Close attention must be given to planting and care, pruning, potential problems and a dash of patience. The payoff comes when the clematis exuberantly thanks you by blooming its heart out from spring until autumn frost.
Clematis will add more beauty to your garden and enhance the plants already growing in your garden. Patience in all that pampering the first few years will pay off as you look up to watch them flower and climb. And, whether you pronounce it “KLEM-uh-tiss”, “klem-AT-is” or “klem-AY-tiss”, the clematis may not reach to the stars but they will certainly shoot for them.
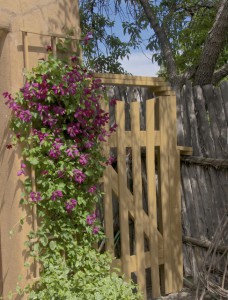
Clematis ‘Margot Koster’ (Photo Janice Tucker)
Below is some helpful planting, care, pruning and potential problems information:
Planting and Care:
The main considerations when planting clematis are location and soil. Choose a spot where the plant can have a cool place for its roots and full sun for the plant-“feet in the shade, face in the sun”. An exception is made for some of the blue flowering clematis that may prefer some shade. Soil that drains well is paramount. Clematis do not like soggy feet, especially during the cold months. The best time for planting is in the fall or spring, keeping in mind to plant without the worry of frost. Temperatures at planting time should be below 85 degrees F and the plant should not be in flower at the time of planting. (Source 2) Check with nurseries for the best type of clematis to plant in your area. There are also species that do well in containers.
Following are steps for planting clematis:
- Water the plant just prior to planting. Be sure to place a stake near the base of the plant near a vine so that the clematis vine will have sufficient support. Be sure your site has a trellis, wall, fence or another plant for it to climb. (Source 3)
- Choose a location that has enough shade to cover the base area of the plant but will allow for 5 to 6 hours of sun as it grows. Plant near the north side of a small shrub that can shade the roots. If there is no existing shade, plant a shrub nearby for this purpose.
- Dig a hole as deep as the root ball and 4 to 6 times as wide to allow the roots to spread. (Source 2). Place about 6 inches of well-rotted manure mixed with a quality topsoil (do not use potting soil) or compost. If the soil has high clay content, add a layer of peat moss to facilitate drainage. (Source 3)
- Remove- very carefully- the plant from its nursery container, trying not to disturb the roots. Some nurseries will ship bare root, wrapped in paper. Gently place the plant in the prepared hole and spread the roots carefully.
- Plant the base of the stem at least 3 to 4 inches below ground level. Some sources even recommend planting 6 inches below ground level. Yes, planting above the base of a plant goes against all our gardening instincts, but all the clematis experts will stress the importance of following this dictum. At planting time, the focus is to establish a healthy root system, which is the reason the base of the clematis is planted several inches below ground. (Sources 3 & 4)
- Backfill with the same good quality topsoil used in Step 3. Firm the soil and water thoroughly. Mulch well and keep mulched to protect the roots, especially during the winter months.
- Water once a week during the growing season or when the top 3 inches are dry. Hot sun and overly saturated soil promote fungi. Consult local nurseries for the proper food. Usually a 20-20-20 fertilizer is good, but do not fertilize when the plant is in bloom. (Source 4)
Pruning:
A novice to clematis might feel overwhelmed when learning about pruning practices. There are three groups of clematis that have different pruning requirements. However, the first year seems to be the same for all three groups. The pruning instructions from the Joy Creek Nursery in Scappoose, Oregon simplified the pruning instructions by recommending the first two pruning items listed below. (Source 5)
- After planting, prune down to the lowest pair of leaf buds on each stem. This will help your plant to become quickly established, promote root growth and will result in a stronger plant.
- After the first year, pruning is not that complicated if one rule is kept in mind: Cut back the plant after it has flowered. And according to Home of Clematis, if no pruning is done, the plant will still flower but not as profusely.
- The three clematis groups are as follows: (Source 5)
- Group A (or I). These early blooming clematis will flower on previous year’s wood. They usually finish blooming by late spring. This group requires the least amount of pruning. Cutting out dead wood and general tidying up is good for the plant.
- Group B (or II). These are usually the large-flowered hybrids that bloom in spring or early summer on year-old wood. Cutting it back about a third after the main bloom has finished will cause the plant to produce new wood and possibly another blooming period in the fall. After the second blooming, it is okay to prune it back but not quite as much as after the first flowering. Maybe just tidy it up a bit. This group seems to be more prone to fungus in the Santa Fe area.
- Group C (or III). This group flowers in the summer on new wood. After flowering remove most of the top growth…yes that would be a hard thing for any gardener to do but it will make the plant start over in the spring to produce new, healthy growth and more flowers. It is okay to wait until winter to cut back or even do it in stages by cutting back dead wood and then fine tuning it later.
Potential Problems: Ascochyta clematidina is the most common fungus that attacks clematis. Cut away the affected stems to about an inch below the infected area. Mildew can be a problem late in the season but will probably not occur if there is good air circulation. Earwigs, aphids and slugs are pests that are likely to nosh on clematis. Check with local nurseries for the best preventatives and treatments. (Source 3)
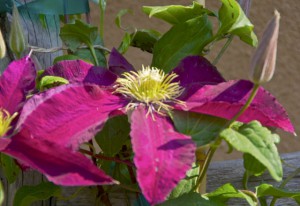
Red Clematis (Photo Janice Tucker)
A few suggested cultivars for the Santa Fe area:
Clematis jackmanii – Purple flowers, June through September, Group C
Clematis druandii – Deep purple-blue flowers, June through September, Group C
Clematis ‘Prince Charles” – Mauve-blue flowers, June through September, Group C
Clematis ‘Ville de Lyon’ – Purple flowers, June through September, Group B or C
Clematis ‘Rooguchi’ – Plum-purple, bell-shaped flowers, June through September, Group C
Clematis ‘Guernsey Cream’ – Cream-colored flowers, spring through summer, second fall bloom, Group B (can be a container plant)
Clematis ‘Viticella Alba Luxurians’ – White flowers, June through September, Group C
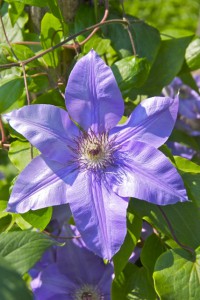
Lavender clematis (Photo Janice Tucker)
Clematis ‘Fleurmerc BV, Wormer’ (also known as ‘Mrs. Spencer Castle’) – Deep pink flowers,
August through September, Group B
Sources:
Source 1: Howells, John, The Rose and the Clematis as Good Companions, Garden Art Press, 1988
Source 2: Phillips, Judith, New Mexico Gardener’s Guide, Cool Springs Press, 1998
Source 3: Home of Clematis, www.homeofclematis.net
Source 4: Planting and Care Instructions, Completely Clematis Specialty Nursery, Ipswich, MA, 2009
Source 5: On Pruning a Clematis, Brewster Rogerson, Joy Creek Nursery, Scappoose, OR, 2001
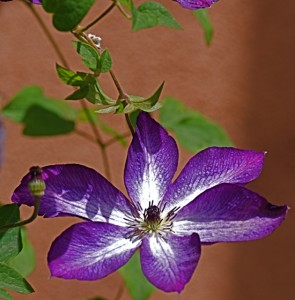
Bi-color Clematis (Photo Janice Tucker)


